Upgrading Firefox 3.6.x to 4.0 on Ubuntu Desktop 10.04
The last few days I’ve been using my Ubuntu desktop 10.04 more and more, which I’m running as a VirtualBox appliance on my Macbook Pro inside of Mac OS X.
Learning the ropes, I’ve stumbled a few times. Luckily, I’ve pretty much figured out how to do everything I needed.
I wanted to upgrade from Firefox 3.6.15 which is what was the latest version of Firefox as part of Ubuntu’s Software Center.
I had run Update Manager before starting and the latest packaged version was Firefox 3.6.15.
To upgrade from 3.6.15 to 4.0, you need to do the following:
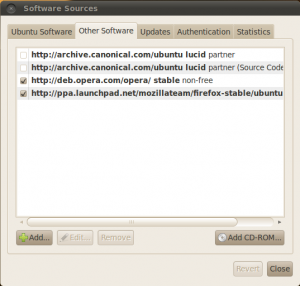
Open up the Ubuntu Software Center then Edit > Software Sources and click the ‘Other Software’ tab. Press ‘Add’ and then paste ppa:mozillateam/firefox-stable into the relevant field.
After you click add, you should see the dialog with all of the available software sources as in the diagram below.
After adding the PPA you will be prompted to update your sources. Once this completes, you can go to System > Administration > Update Manager to perform an upgrade.
I found that a couple of my add-ons were not compatible, but Firefox 4.0 only just came out yesterday, so I’ll give it some time.
Installing Opera 11 on Ubuntu 10.04
After setting up my Ubuntu 10.04 desktop through a VirtualBox appliance on my Macbook Pro 15″, I installed a couple of pieces of software through the Ubuntu Software Center which is under the Applications menu item. This consisted of Chromium – Google Chrome browser, VLC player, and Adobe Flash player.
I wanted to test out Opera on Ubuntu, but Opera does not appear in the list of available software.
I found these instructions on the Ubuntu help site, but wanted to clarify them here.
The reason is that I found the instructions at http://deb.opera.com/ to be confusing. Mainly, I didn’t know exactly which apt source I should add.
This assumes a fresh install of Ubuntu 10.04 desktop with all software updated – meaning that you have run the following which updates all software, security updates, and patches that have come out since the VirtualBox appliance image or CD/DVD that you used to install Ubuntu was created. This should be the first thing you do on any Ubuntu server or desktop install.
$ sudo apt-get update
$ sudo apt-get upgrade
Add this to the list of software sources:
System\Administration\Software sources, and then click the Other Software Tab and Add
deb http://deb.opera.com/opera/ stable non-free
NOTE: if you prefer to do things on the command line, the GUI menu item for this stores the sources in /etc/apt/sources.list. So you can manually edit that file to add your new source.
Issue this command from a terminal window to add the Opera GPG key
$ wget -qO - http://deb.opera.com/archive.key | sudo apt-key add -
Now that you have the source defined and the GPG key installed, you can install the software with these two commands.
$ sudo apt-get update
$ sudo apt-get install opera
Now you can go to the menu and start Opera.
Applications\Internet\Opera
Note, you can also install Opera by downloading it from another browser like you can with Windows or Mac OS X, and then running the downloaded installer.
By installing it through aptitude (sudo apt-get install), it will be upgraded automatically any time there is a newer stable release via Ubuntu’s normal software update mechanism, which by default runs daily. This is the Ubuntu way of doing things.
UPDATE: I found that after I installed this and ran sudo apt-get update or updated the Ubuntu software through Update Manager that I received the following error:
W: GPG error: http://deb.opera.com stable Release: The following signatures couldn't be verified because the public key is not available: NO_PUBKEY A2019EA84E7532C8
I fixed this by running this command which I found at this source
$ gpg --keyserver pgpkeys.mit.edu --recv-key A2019EA84E7532C8
Running Ubuntu desktop on a Macbook Pro
So today, I decided I wanted to try out Ubuntu desktop. I wanted to make sure that a web development project looked correct in all of the browsers on Ubuntu like they look on Windows 7 and Mac OS X. Maybe, that was just the excuse I was needing to finally try Ubuntu desktop.
I have a Macbook Pro 15″ with Mac OS X 10.6.6 installed.
I found that there are 3 main virtualization consoles for Mac OS X.
I chose VirtualBox since it’s an open source project and free. VirtualBox was a Sun project, so it, along with OpenOffice.org, MySQL, and Java are owned by Oracle.
You can download VirtualBox for Mac OS X on their downloads page.
I downloaded and installed the package like any other Mac OS X package.
I also found that you can find several operating system images, which are referred to as “appliances” from virtualboxes.org.
I downloaded Ubuntu 10.04 LTS Desktop here.
It is 2GB, so it may take a while, and once it is downloaded, you need to unarchive/expand it.
Start up the Virtualbox console in the Applications folder.
Click on New to create a new appliance. The first couple of screens are self explanatory.
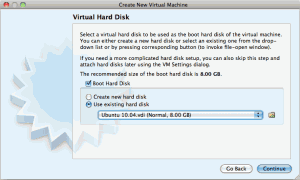
When you get to the Virtual Hard Disk screen, select Use existing hard disk, and use the browse selector to find the extracted Ubuntu 10.04 image that you downloaded from virtualboxes.org. The filename shuld be “Ubuntu 10.04.vdi”
Follow the rest of the screens and the new virtual machine should be created.
If you want to connect to the network via your wireless card like me, you should make one small change before starting your Ubuntu desktop.
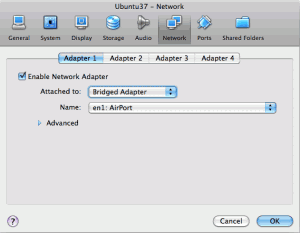
Right click on the virtual machine, and select “settings.”
On this dialog, select network, adapter 1, and change attached to from “NAT” to “Bridged adapter” and select the Airport card.
Now you can start the virtual machine.
Once, the machine starts, you will only be able to see a maximum of 800×600 screen resolution.
To fix this, you should install the guest additions.
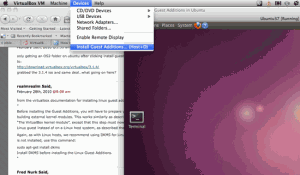
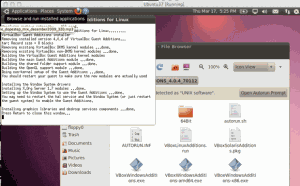
You do this by highlighting the Ubuntu desktop guest host, then go to the Mac OS X menu for VirtualBox VM and select Devices/Install Guest Additions.
Once, this is installed, go to the Ubuntu menu at the top of the screen and select Places, and then VBOXADDITIONS_4.04_70112.
A file browser windows will open up with the mounted CD image for the VirtualBox additions.
Click “Open Autoprompt Run”
Click “Run”
Once, it is finished, you need to restart Ubuntu from the menu at the top right.
Once, it reboots, you can choose the 1024X768 screen resolution, and if you go to the VirtualBox menu in Mac OS X, you can choose Machine, and then there are several screen options. I choose “Auto-Resize Guest display” or Full Screen Mode.
Happy times with Ubuntu on Mac OS X!
Session Expiration in Drupal
I’ve spent a significant amount of time researching session expiration in Drupal.
It turns out that by default Drupal sessions a session of 23 days. You can configure the session to expire at a shorter interval and you can configure Drupal to expire the session when the browser closes.
In addition, there is a module called Session_Expire, which pushes the cleanup of the sessions table in the database to the core Drupal cron job instead of relying on PHP garbage collection of your particular operating system which can vary.
Here’s the details of what I changed in one Drupal 6 setup. There is a whole section on sessions which are stored in /sites/default/settings.php.
/* ini_set('session.cookie_lifetime',  2000000); default 23 days */
/* expire session on browser close */
ini_set('session.cookie_lifetime',  0);

/* ini_set('session.gc_maxlifetime',   200000); default 23 days */
/* session expires after 1 hour (without closing browser) */
ini_set('session.gc_maxlifetime',   3600);

/* The following two lines collect garbage, this is done with
session_expire module.  In Drupal 7 they will be handled here
ini_set('session.gc_probability',   1);
ini_set('session.gc_divisor',   1);
*/
It doesn’t seem that there is much information out there on how this works, so I thought I would share my findings.
Also, as noted in the last comment I included from my settings.php, this is handled better in Drupal 7.
Openoffice.org vs. LibreOffice
I just noticed that there was a new player in town in the desktop office productivity realm with the name LibreOffice.
I was watching a Ubuntu 11 desktop preview video from ZD-Net and noticed that they were referencing the fact that Ubuntu will now come installed with LibreOffice instead of OpenOffice.org.
Low and behold after a bit of research, it seems that key developers of OpenOffice.org are not happy with Oracle’s direction for OpenOffice.org and have defected to a new nonprofit organization called the Document Foundation, which maintains LibreOffice.
In addition to Windows and Mac versions being available, it appears that other Linux software distributors Novell SUSE, Redhat, and Canonical Ubuntu are backing the Document Foundation and LibreOffice as well.
More information here at Infoworld.
This certainly creates a dilemma on which version to use. I think I’ll stick with OpenOffice.org for the time being.
Has anybody tried LibreOffice yet? What are your thoughts?
