Running Ubuntu desktop on a Macbook Pro
So today, I decided I wanted to try out Ubuntu desktop. I wanted to make sure that a web development project looked correct in all of the browsers on Ubuntu like they look on Windows 7 and Mac OS X. Maybe, that was just the excuse I was needing to finally try Ubuntu desktop.
I have a Macbook Pro 15″ with Mac OS X 10.6.6 installed.
I found that there are 3 main virtualization consoles for Mac OS X.
I chose VirtualBox since it’s an open source project and free. VirtualBox was a Sun project, so it, along with OpenOffice.org, MySQL, and Java are owned by Oracle.
You can download VirtualBox for Mac OS X on their downloads page.
I downloaded and installed the package like any other Mac OS X package.
I also found that you can find several operating system images, which are referred to as “appliances” from virtualboxes.org.
I downloaded Ubuntu 10.04 LTS Desktop here.
It is 2GB, so it may take a while, and once it is downloaded, you need to unarchive/expand it.
Start up the Virtualbox console in the Applications folder.
Click on New to create a new appliance. The first couple of screens are self explanatory.
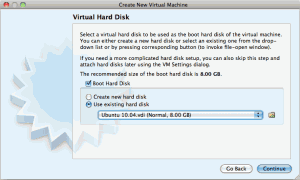
When you get to the Virtual Hard Disk screen, select Use existing hard disk, and use the browse selector to find the extracted Ubuntu 10.04 image that you downloaded from virtualboxes.org. The filename shuld be “Ubuntu 10.04.vdi”
Follow the rest of the screens and the new virtual machine should be created.
If you want to connect to the network via your wireless card like me, you should make one small change before starting your Ubuntu desktop.
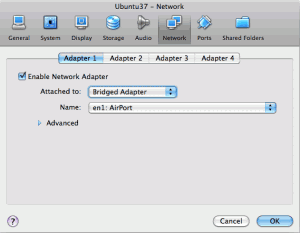
Right click on the virtual machine, and select “settings.”
On this dialog, select network, adapter 1, and change attached to from “NAT” to “Bridged adapter” and select the Airport card.
Now you can start the virtual machine.
Once, the machine starts, you will only be able to see a maximum of 800×600 screen resolution.
To fix this, you should install the guest additions.
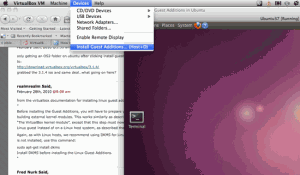
You do this by highlighting the Ubuntu desktop guest host, then go to the Mac OS X menu for VirtualBox VM and select Devices/Install Guest Additions.
Once, this is installed, go to the Ubuntu menu at the top of the screen and select Places, and then VBOXADDITIONS_4.04_70112.
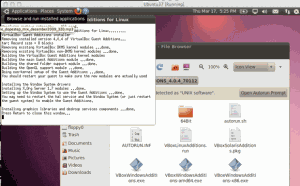
A file browser windows will open up with the mounted CD image for the VirtualBox additions.
Click “Open Autoprompt Run”
Click “Run”
Once, it is finished, you need to restart Ubuntu from the menu at the top right.
Once, it reboots, you can choose the 1024X768 screen resolution, and if you go to the VirtualBox menu in Mac OS X, you can choose Machine, and then there are several screen options. I choose “Auto-Resize Guest display” or Full Screen Mode.
Happy times with Ubuntu on Mac OS X!


[...] last few days I’ve been using my Ubuntu desktop 10.04 which I’m running as a VirtualBox appliance on my Macbook Pro inside of Mac OS [...]